

ToneMatch & Telefunken M80
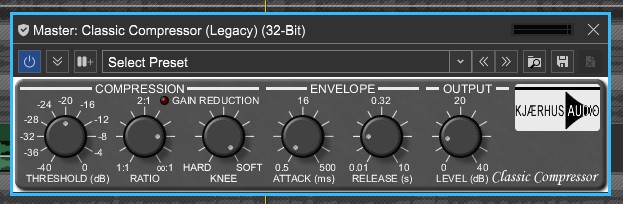
COMPRESSION
To dial in the compression settings for your Telefunken M80 vocal microphone on the Bose T8S ToneMatch mixer, you need to navigate to the Comp/Gate menu.
Because the M80 has an energetic, dynamic top-end, compression is highly effective at smoothing out spikes when you hit high notes, keeping your vocals balanced in the mix.
How to Access Compression
- Press the CH Edit button for your Telefunken M80 channel.
- Turn the Rotary Selector knob to the Comp/Gate menu.
- Turn the first button under the screen to select Comp (Compression).
Recommended Compression Settings for the M80
The Bose T8S simplifies compression by tying multiple traditional settings (like attack and release) into optimized, predefined algorithms based on the type you choose.
| Parameter | Recommended Setting | What It Does For Your Vocal |
|---|---|---|
| Type | Vocal or Light | Vocal uses a medium attack/release optimized for speech and singing. Light is best if you want an ultra-transparent sound. |
| Thresh (Threshold) | -10 dB to -18 dB | Sets the volume level where the compressor starts working. Lower numbers mean it clamps down sooner. |
| Gain (Makeup) | +2.0 dB to +4.0 dB | Restores the volume lost from compressing the loud peaks, making the overall vocal sound thicker and louder. |
Step-by-Step Tuning Guide
- Set the Type: Turn the knob to select the Vocal compression algorithm.
- Find Your Threshold: While singing or speaking into the M80 at your normal performance volume, lower the Thresh value down from 0 dB. Watch the volume meter on the screen. You want the compressor to activate (show reduction) only during your loudest notes or words.
- Adjust the Gain: Because compression lowers the peak volumes, turn up the Gain parameter slightly until the overall volume of your channel sounds identical whether the compressor is turned on or bypassed.
💡 Pro-Tip for the M80
The Telefunken M80 has amazing transient response (it catches sudden sounds quickly). If you find that the Vocal compression setting feels like it is “squashing” your high notes too much or making the microphone sound dull, switch the Type to Light. This retains the crisp, condenser-like air of the M80 while gently controlling your volume fluctuations.
Are you running into any issues with feedback or room noise being amplified when you turn the compressor on? If so, I can guide you on setting up the Noise Gate in that same menu to quiet down the mic when you aren’t singing.
CHORUS
To optimize your Telefunken M80 dynamic microphone with the Bose T8S ToneMatch mixer, you want a configuration that complements the M80’s signature bright, detailed top-end and tight proximity effect. Because the M80 already has a condenser-like clarity, your chorus and gain settings should remain highly precise.
1. Step-by-Step ToneMatch Configuration
Gain Staging (Critical First Step)
The Telefunken M80 requires a healthy amount of gain compared to standard dynamic mics.
- Sing or speak into the mic at your peak performance volume.
- Turn the channel Trim knob clockwise until the LED ring flashes steady green.
- If it flashes red, turn it down slightly. You want it right on the edge of green for maximum signal-to-noise ratio.
Selecting the ToneMatch Preset
Bose does not have a dedicated preset labeled “Telefunken M80,” but you can achieve an incredible match using the following generic category:
- Set the category to Vocal Mics.
- Select the Dynamic Mic or Handheld Mic preset.
- Alternative: If you want a completely transparent starting point, select Flat / Bypass to let the M80’s natural frequency response shine.
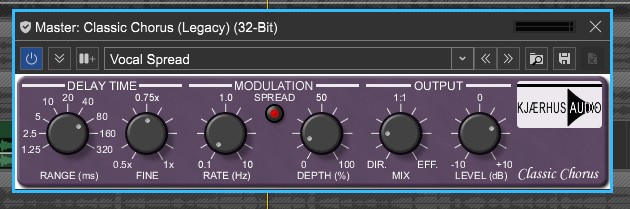
2. Tailored Chorus Settings for the Telefunken M80
Because the M80 is exceptionally crisp in the high frequencies, too much chorus can sound harsh or brittle. A subtle “detune” style thickening works best.
| Parameter | Recommended Setting | Purpose |
|---|---|---|
| Mix | 10% – 12% | Keeps the primary vocal upfront and clear while adding a ghost-like backing layer. |
| Speed | 0.6 Hz – 0.9 Hz | A very slow rate prevents the vocal from sounding “wobbly” or pitchy. |
| Depth | 25% – 35% | Provides just enough widening to thicken the vocal without washing out the mid-range. |
3. Tuning the EQ (Compensating for the M80)
The M80 features a distinct upper-midrange boost (around 2 kHz to 5 kHz). When you add chorus, these frequencies modulate. If your vocal sounds too piercing with the effect turned on, make these adjustments in the zEQ menu:
- High: Leave at 0.0 dB (the M80 has beautiful air).
- Mid: Drop to -1.5 dB or -2.0 dB if the chorus makes the vocal sound too aggressive or nasal.
- Low: Give a slight boost of +1.0 dB if you are standing further back from the mic and lose the low-end warmth.
REVERB
To dial in the reverb settings for your Telefunken M80 vocal microphone on the Bose T8S ToneMatch mixer, you need to use two distinct menus: the global Reverb Type menu and the individual channel Reverb Mix menu.
Because the M80 has an articulate, crisp top-end, adding too much bright reverb can cause sibilance (harsh “S” sounds). A warm, smooth reverb works best to complement the mic’s natural clarity.
Step 1: Choose and Configure Your Reverb Type (Global)
First, you need to select the style of reverb you want to use across the mixer. Turn the main Rotary Selector knob on the right side of the mixer to Reverb Type.
| Parameter | Recommended Setting | Description |
|---|---|---|
| Type | Plate or Medium Stage | Plate is smooth, dense, and classic for studio vocals. Medium Stage adds realistic live depth without being muddy. |
| Time | 1.8 s – 2.2 s | Controls how long the reverb tail lasts. Around 2 seconds is the sweet spot for a lush, natural fade. |
| Balance | 45% (Slightly Warm) | Adjusts the tone of the reverb. Setting it slightly below 50% rolls off harsh high frequencies, preventing the M80 from sounding too bright or piercing in the echo. |
Step 2: Apply the Reverb to Your Mic Channel (Local)
Once the global reverb is set up, you must send your microphone signal to it.
- Turn the main Rotary Selector knob back to CH Edit.
- Press the CH Edit button for your Telefunken M80 channel.
- Turn the menu knob to Reverb (often labeled Rev/Aux or found via the channel edit menu depending on your firmware layout).
- Adjust the Mix (or Send) level:
- Recommended Mix: 15% – 25%
- Rule of thumb: Turn it up until you can distinctly hear the effect, then back it off by about 3% to 5%. In a live venue, the room itself will add natural reflections, so a little goes a long way.
💡 Pro-Tip: Managing Reverb and Compression Together
Since you are using compression (from our previous step), remember that compressors bring up quiet sounds—including reverb tails. If your vocal feels like it is swimming in an echo or starting to ring with feedback between your lyrics, try dropping the Reverb Mix down by a few percent, or use the Noise Gate in the Comp/Gate menu to cut off the microphone signal entirely when you stop singing.
What kind of space are you performing in? If you are in a highly reflective room (like a church or concrete venue) versus a dead room (like a carpeted studio or outdoors), we can adjust the Time parameter to prevent feedback or muddy sound.
Mackie DL32S Telefunken M80
Overview
To get a great vocal sound combining a Telefunken M80 microphone with a Mackie DL32S digital mixer, you want to tailor your channel strip settings to complement the mic’s natural characteristics.
The Telefunken M80 is famous for its condenser-like top end, excellent clarity, and minimal proximity effect. Because it already has a built-in upper-midrange boost, your goal on the Mackie DL32S is to control the high-mids while adding warmth and smooth spatial effects.
Here are the recommended settings for your channel strip and chorus effect:
Channel Strip Settings
1. Preamp Gain & High Pass Filter (HPF)
- Gain: Adjust until your input meter averages around -18 dBFS to -12 dBFS on peaks. The M80 is a dynamic mic and requires a decent amount of clean gain.
- HPF (Low Cut): Engage and set between 100 Hz – 125 Hz for a standard vocal. This cleans up stage rumble and mud without thinning out the voice.
2. Equalizer (4-Band Parametric EQ)
- Low (Shelving/Bell): Subtle boost at 200 Hz (+1 to +2 dB) if the vocal lacks warmth or body, as the M80 can sometimes sound a bit lean compared to a Shure SM58.
- Low-Mid (Bell): Sweeping cut between 300 Hz – 500 Hz (-2 or -3 dB) with a medium Q. This removes “boxiness” and cleans up the room sound.
- High-Mid (Bell): The M80 has a natural peak around 2 kHz – 5 kHz. If the vocal sounds too piercing, harsh, or sibilant, apply a gentle cut of -1.5 dB at 3.5 kHz.
- High (Shelving): Leave flat or add a tiny “air” boost at 10 kHz (+1 dB) if you want an ultra-modern, crisp top-end.
3. Compressor
- Threshold: Set so you are pulling -3 dB to -6 dB of gain reduction on the loudest parts.
- Ratio: 2.5:1 or 3:1 for a smooth, natural vocal.
- Attack: 20ms (allows the initial consonants/transients to cut through).
- Release: 150ms (smooth decay).
Chorus FX Settings (Mackie Master Fader)
For a lead vocal, you generally want a subtle, thickening chorus rather than a heavy, swirling guitar-style effect. Route your vocal channel to one of the FX sends loaded with the Chorus plugin.
- Mode / Type: Choose Stereo Chorus or Dimension if available in Master Fader.
- Rate (Speed): Keep this slow, between 0.1 Hz – 0.5 Hz. Fast rates cause pitch wobbles that sound unnatural on vocals.
- Depth (Intensity): Set to 30% – 40%. You want width, not detuning.
- Width: Maximize to 100% to push the effect to the edges of the stereo field, keeping the dry vocal dead center.
- Voices: 2 or 4 voices for a lush, smooth ensemble effect.
- Mix / Blend: If using as an insert, set to 15% – 20%. If using an FX Return fader (recommended), set the internal FX mix to 100% Wet and blend the FX Return fader to taste (usually sitting comfortably tucked under the dry vocal).
COMPRESSION
For a live performance, your compression strategy needs to keep both vocals sitting consistently in the mix without triggering feedback. Because the Telefunken M80 has excellent transient response, your compressor settings should control large volume spikes while preserving the mic’s natural clarity.
Here are the specific compressor settings for male and female live vocals on your Mackie DL32S:
Male Live Vocal Settings
Male live vocals typically have large dynamic swings in the low-mids when they get close to the mic, and booming spikes when they push for power.
- Threshold: Set to catch peaks, averaging -3 dB to -6 dB of gain reduction during loud choruses.
- Ratio: 3:1 (gives firm control over heavy vocal pushes without pumping).
- Attack: 25 ms to 30 ms. A slightly slower attack allows the initial “p”, “t”, and “k” consonants to pass through, keeping the lyrics intelligible over the band.
- Release: 200 ms. A slightly longer release holds the compressor down through sustained notes, preventing a “pumping” sound in the low-mids.
- Makeup Gain: Match the peak level of the compressed signal to the uncompressed signal (usually +2 dB to +4 dB).
Female Live Vocal Settings
Female live vocals often get piercing or thin in the upper-mids when singing loudly. The goal here is smooth control that keeps the vocal sweet and upfront.
- Threshold: Set to trigger mostly on high-energy choruses, aiming for -4 dB to -5 dB max gain reduction.
- Ratio: 2.5:1 (a softer ratio keeps the higher register sounding open and natural).
- Attack: 15 ms to 20 ms. A slightly faster attack captures the fast, sharp transients common in higher vocal frequencies before they become piercing.
- Release: 120 ms to 150 ms. A faster release ensures the compressor lets go quickly so lower, softer verses don’t get accidentally muffled.
- Makeup Gain: +1 dB to +3 dB (just enough to recover the lost average volume).
Pro-Tips for Live Compression & Feedback
- Soft Knee: Always select a Soft Knee setting on your Mackie Master Fader app if available. It makes the transition into compression smoother and harder for the audience to notice.
- The Feedback Trap: Compression reduces the loudest parts and brings up the quietest parts (including the stage noise and bleed). If you compress more than -6 dB on a live stage, you drastically increase the risk of microphone feedback through the stage monitors.
- The “Safety Net” Limiter: If either singer has massive volume jumps, do not try to fix it entirely with one compressor. Instead, use a subtle 2:1 channel compressor for smoothing, and rely on a fast brick-wall limiter on your main LR output bus just to catch dangerous system-peaking overloads.
CHORUS
For a live performance, your chorus settings must focus on creating a wide, lush sound without altering the singers’ pitch or causing feedback in the stage monitors.
On the Mackie DL32S (Master Fader app), route your vocal channel to an FX Send running the Chorus engine, and use these precise live settings:
Live Vocal Chorus Settings
| Parameter | Recommended Setting | Why it matters for Live Vocals |
|---|---|---|
| Type / Mode | Stereo / Dimension | Spreads the effect wide across the Left/Right mains, keeping the dry vocal focused dead center. |
| Rate (Speed) | 0.15 Hz – 0.35 Hz | Crucial: Keep it ultra-slow. Anything faster will introduce a noticeable “pitch-wobble” that makes live singers sound out of tune. |
| Depth | 25% – 35% | Controls how deep the modulation goes. Keep it low to blend seamlessly underneath the lead vocal. |
| Voices | 2 or 4 Voices | More voices create a smoother, ensemble “thickening” effect rather than a harsh, metallic modulation. |
| Width | 100% | Pushes the chorus effect all the way to the edges of the PA system to create space. |
| High Pass (HPF) | 150 Hz (if available) | Filters out the low end of the effect so the vocal doesn’t sound muddy or boomy in the room. |
How to Blend it into the Live Mix
- Set the Internal Mix to 100% Wet: Ensure the chorus plugin itself is set to 100% wet so no dry vocal is running through the FX processor loop.
- The “Tucked” Method: Bring the FX Return Fader all the way down. Have the band play, and slowly slide the FX Return fader up until you can just barely hear the chorus. Then, back it down 2 dB.
- The Live Rule: In a live room, if you can explicitly hear the chorus effect swirling during a full band song, it is likely too loud and will wash out the vocal clarity. It should feel like a widening safety net that makes the vocal sound “big,” rather than a distinct effect.
Critical Stage Warning: Monitor Sends
Never send the Chorus FX Return to the vocalists’ floor monitors or In-Ear Monitors (IEMs).
Because chorus slightly alters the pitch time-arrival to create the effect, sending it back to the singers will make them feel like they are singing flat or sharp. Keep the stage monitors 100% dry, and only send the chorus to the Main House (L/R) mix.
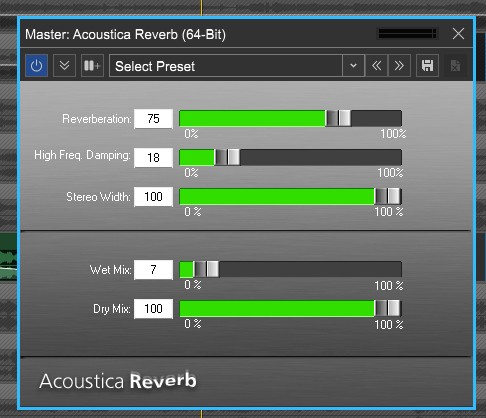
REVERB
For a live performance, your reverb needs to add depth and glue the vocals into the mix without washing out the lyrics or muddying up the room’s natural acoustics.
On the Mackie DL32S, route your vocals to an FX Send running a Plate or Hall reverb, and use these specific settings for male and female live vocals:
🎤 Live Vocal Reverb Settings
| Parameter | Plate Reverb (Best for Pop/Rock) | Hall Reverb (Best for Ballads/Acoustic) |
|---|---|---|
| Decay Time | 1.2s – 1.6s (Short & punchy) | 1.8s – 2.2s (Large & spacious) |
| Pre-Delay | 25 ms – 40 ms | 40 ms – 60 ms |
| High Pass Filter (HPF) | 200 Hz | 250 Hz |
| Low Pass Filter (LPF) | 5 kHz – 6 kHz | 4 kHz |
🔍 Key Parameters Explained for Live Mixing
- Pre-Delay (The Secret Weapon): This delays the start of the reverb reflection. Setting it between 25ms and 60ms allows the sharp, clear transient of the Telefunken M80 to cut through the PA before the wash of the reverb begins. This keeps the lyrics highly intelligible.
- The “Abbey Road” Filter (HPF/LPF): Live rooms are naturally boomy and reflective.
- Cut the Lows (HPF to 200Hz+): Keeps low-end vocal mud out of the reverb tail.
- Cut the Highs (LPF to 5kHz): Prevents the reverb from sounding “sibilant,” metallic, or creating high-frequency feedback spikes from s, t, and ch sounds.
- Plate vs. Hall: Use a Plate reverb for fast, energetic tracks because it adds brightness and thickness without occupying a lot of space in the mix. Use a Hall reverb for slow, open tracks where the vocal has room to breathe.
🎚️ Mixing & Routing Rules
- Keep Monitors Dry: Just like the chorus, do not send the reverb return into stage floor monitors. It will instantly trigger feedback and make it incredibly difficult for the singers to pitch accurately. (A tiny amount is acceptable only if they are using In-Ear Monitors).
- Blend to the Room: If you are playing in a small, concrete, or highly reflective venue (like a bar with brick walls), the room is already providing natural reverb. Turn your DL32S reverb fader down lower than usual. If you are playing outdoors or in a heavily curtained room, you will need to push the reverb fader higher to compensate for the “dead” environment.
TAP-TEMPO
Adding a tap-tempo delay to your third FX lane is the ultimate pro trick for live vocals. Unlike reverb, which creates a continuous “wash,” a delay repeats specific words, adding massive depth and excitement to the mix without cluttering the room or causing feedback.
Here is how to set up and control a vocal delay on your Mackie DL32S:
⏱️ Tap-Tempo Delay Settings
On your third FX slot, select the Mono Delay or Tape Delay engine and apply these parameters:
| Parameter | Recommended Setting | Why it matters for Live Vocals |
|---|---|---|
| Delay Time | 1/4 Note (Quarter) or 1/8 Note (Eighth) | Linked to your tap tempo. Quarter notes are great for ballads; eighth notes work well for faster pop/rock tracks. |
| Feedback (Regen) | 15% – 25% | Controls how many times the echo repeats. Aim for 2 to 3 audible repeats before it dies out. |
| High Pass Filter (HPF) | 300 Hz | Strictly cuts out low-end boominess so the echoes don’t muddy up the band. |
| Low Pass Filter (LPF) | 3 kHz – 4 kHz | Crucial: Shaves off the crisp highs. Darker echoes sit perfectly behind the lead vocal without fighting it for attention. |
🎚️ How to Mix & Control Live Delay
1. Tap the Tempo to the Song
Before or during each song, use the Tap button on your Master Fader screen to tap along with the drummer’s hi-hat or snare. This perfectly syncs the vocal echoes to the beat of the music, making the effect sound intentional and polished.
2. The “Tucked” Approach vs. “Dub” Throws
- The Set-and-Forget Method (Tucked): Keep the FX Return fader low (around -15 dB to -20 dB). The delay will softly echo behind every line the singers perform, thickening their sound automatically.
- The “Delay Throw” Method (Recommended): Keep the FX Return fader up at performance volume, but keep the individual channel’s FX Send muted. When a singer holds out a big, dramatic note at the end of a chorus line, quickly unmute the send for just that word, then mute it again. This creates a spectacular, stadium-level echo effect on key phrases without cluttering the verses.